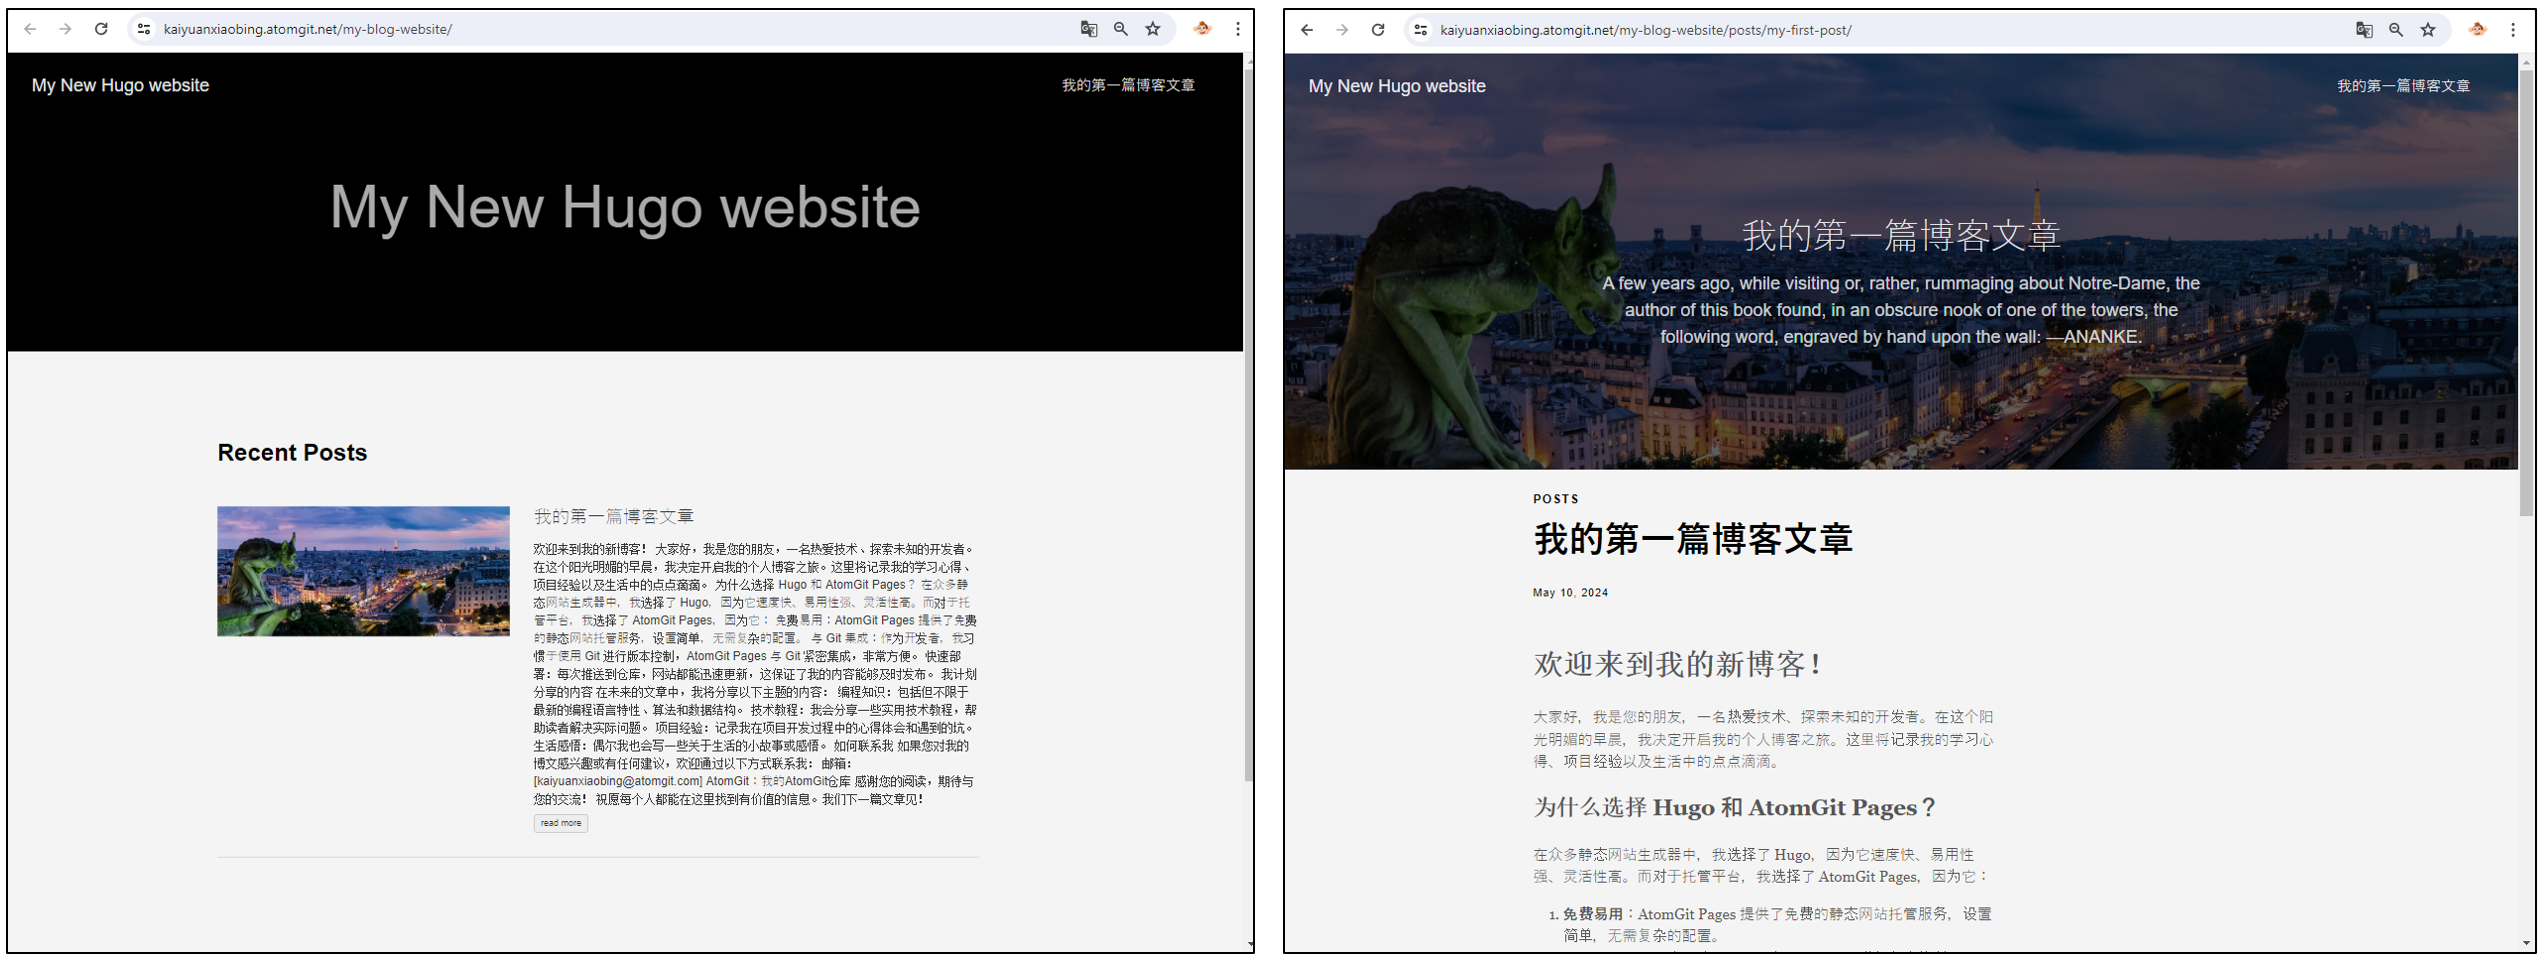
教程最终效果预览:https://kaiyuanxiaobing.atomgit.net/my-blog-website/
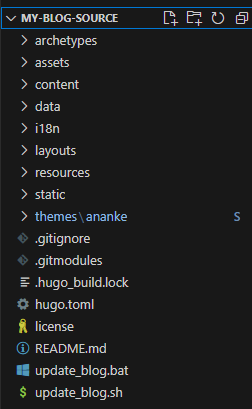
目录结构参考
完成后的项目结构应该类似这样:
准备工作
在开始之前,我们需要安装和配置一些必要的工具:
1. 账号准备
- 注册一个 AtomGit 账户:访问 https://atomgit.com

2. 必要工具安装
Git 安装
根据你的操作系统选择对应的安装方式:
- Windows: 下载并安装 Git for Windows
- macOS: 使用 Homebrew 安装:
brew install git - Linux: 使用包管理器安装,如 Ubuntu:
sudo apt-get install git
Hugo 安装
选择适合你系统的安装方式:
- Windows: 下载并安装 Hugo for Windows
- macOS: 使用 Homebrew:
brew install hugo - Linux: 使用包管理器安装,如 Ubuntu Snap:
sudo snap install hugo
3. Git 配置
打开终端,配置你的 Git 用户信息:
git config --global user.email "your.email@example.com"
git config --global user.name "Your Name"
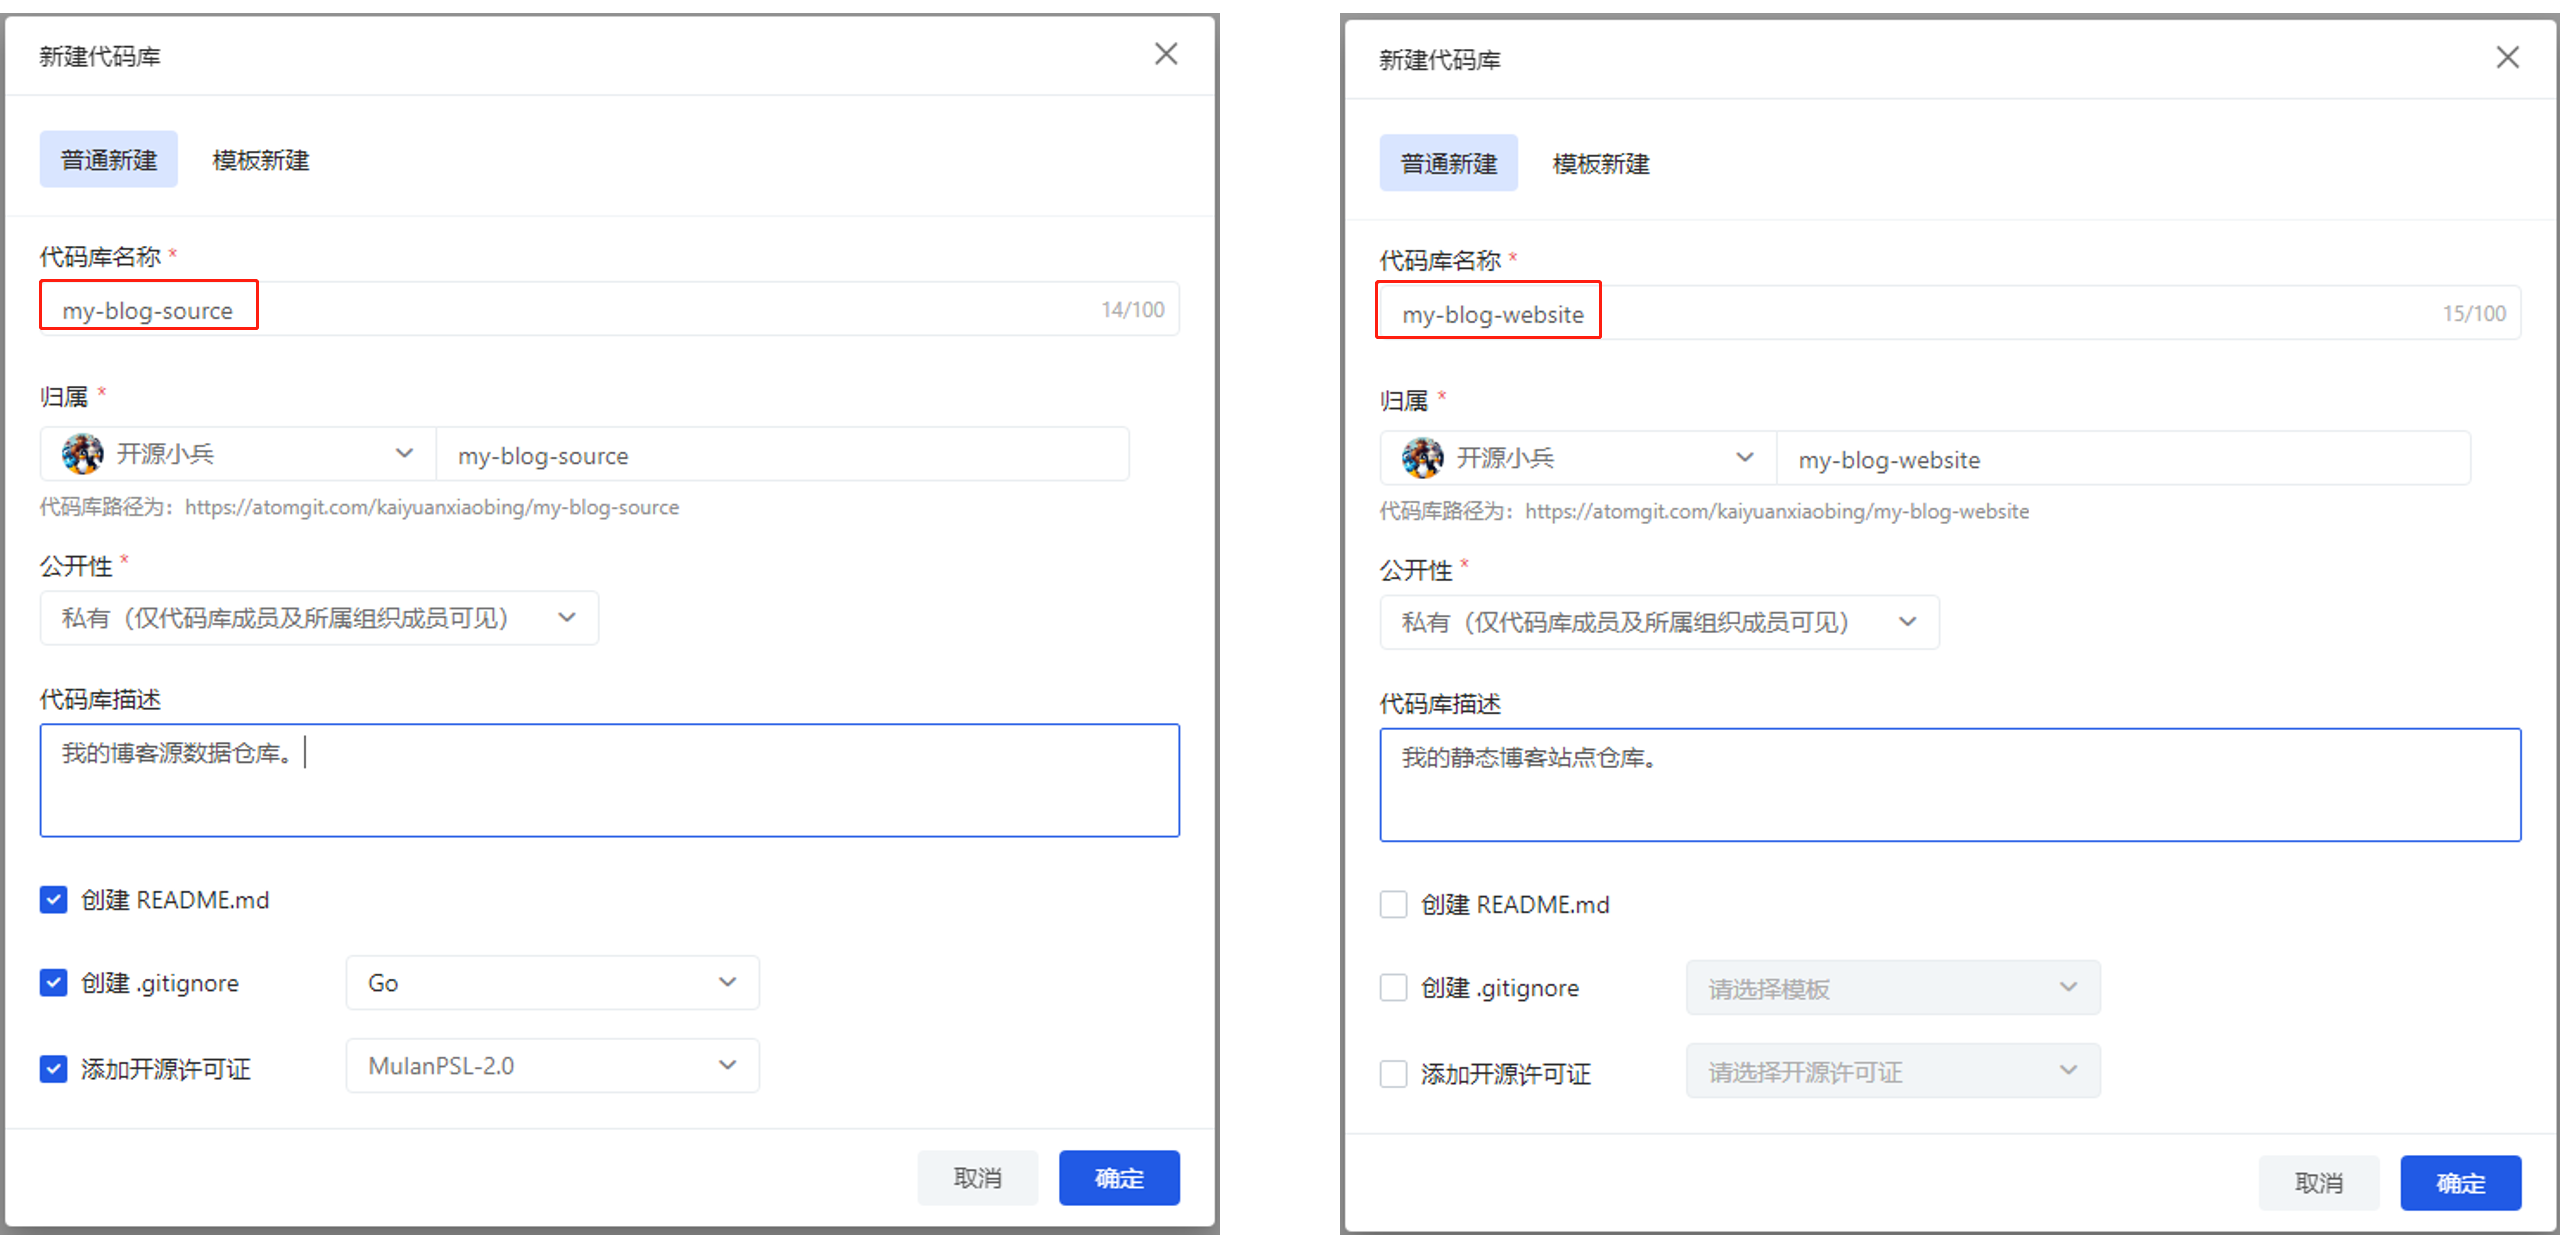
1. 创建 AtomGit 仓库
我们需要创建两个仓库:
my-blog-source: 存放博客源码my-blog-website: 存放生成的静态网站文件(需设为公开)

重要:my-blog-website 仓库必须设置为"公开"类型,否则 Pages 将无法正常访问。
2. 配置 SSH 访问
- 按照 AtomGit 官方文档 配置 SSH 密钥
- 获取仓库的 SSH URL

- 克隆源码仓库到本地:
git clone git@atomgit.com:你的用户名/my-blog-source.git
cd my-blog-source

3. 初始化 Hugo 站点
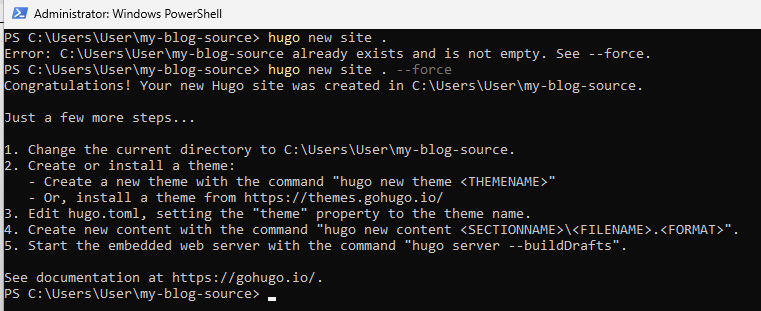
- 在 my-blog-source 目录下初始化 Hugo:
hugo new site . --force
- 安装主题 从 Hugo 主题库 选择一个主题,这里我们使用 ananke 主题:
git submodule add https://github.com/theNewDynamic/gohugo-theme-ananke.git themes/ananke

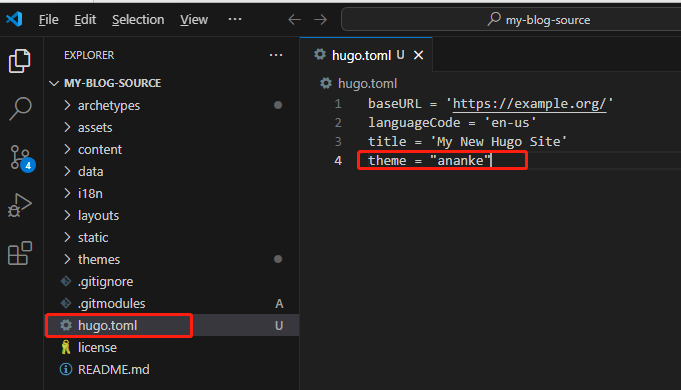
- 配置主题
编辑
hugo.toml文件:
theme = "ananke"
4. 创建和预览内容
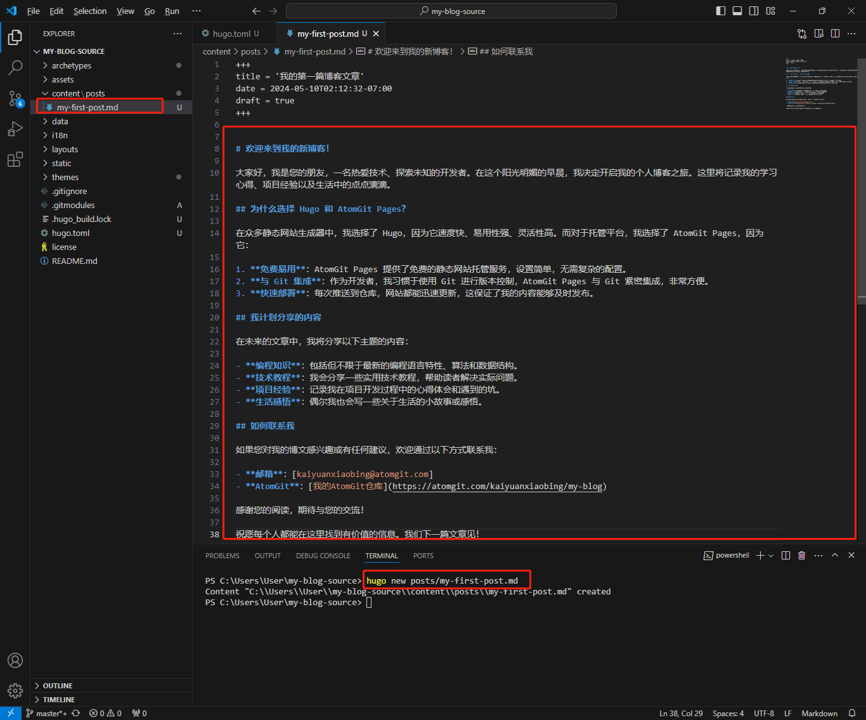
- 创建新文章:
hugo new posts/my-first-post.md

- 编辑文章内容:
- 本地预览:
hugo server -D
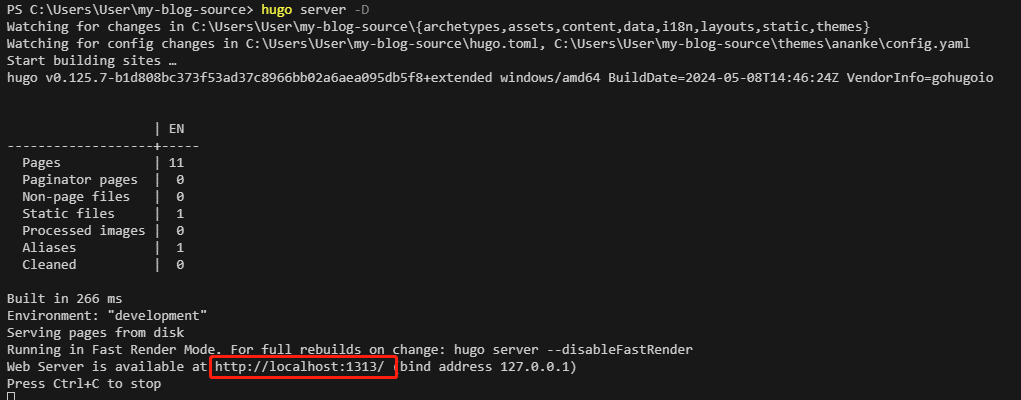
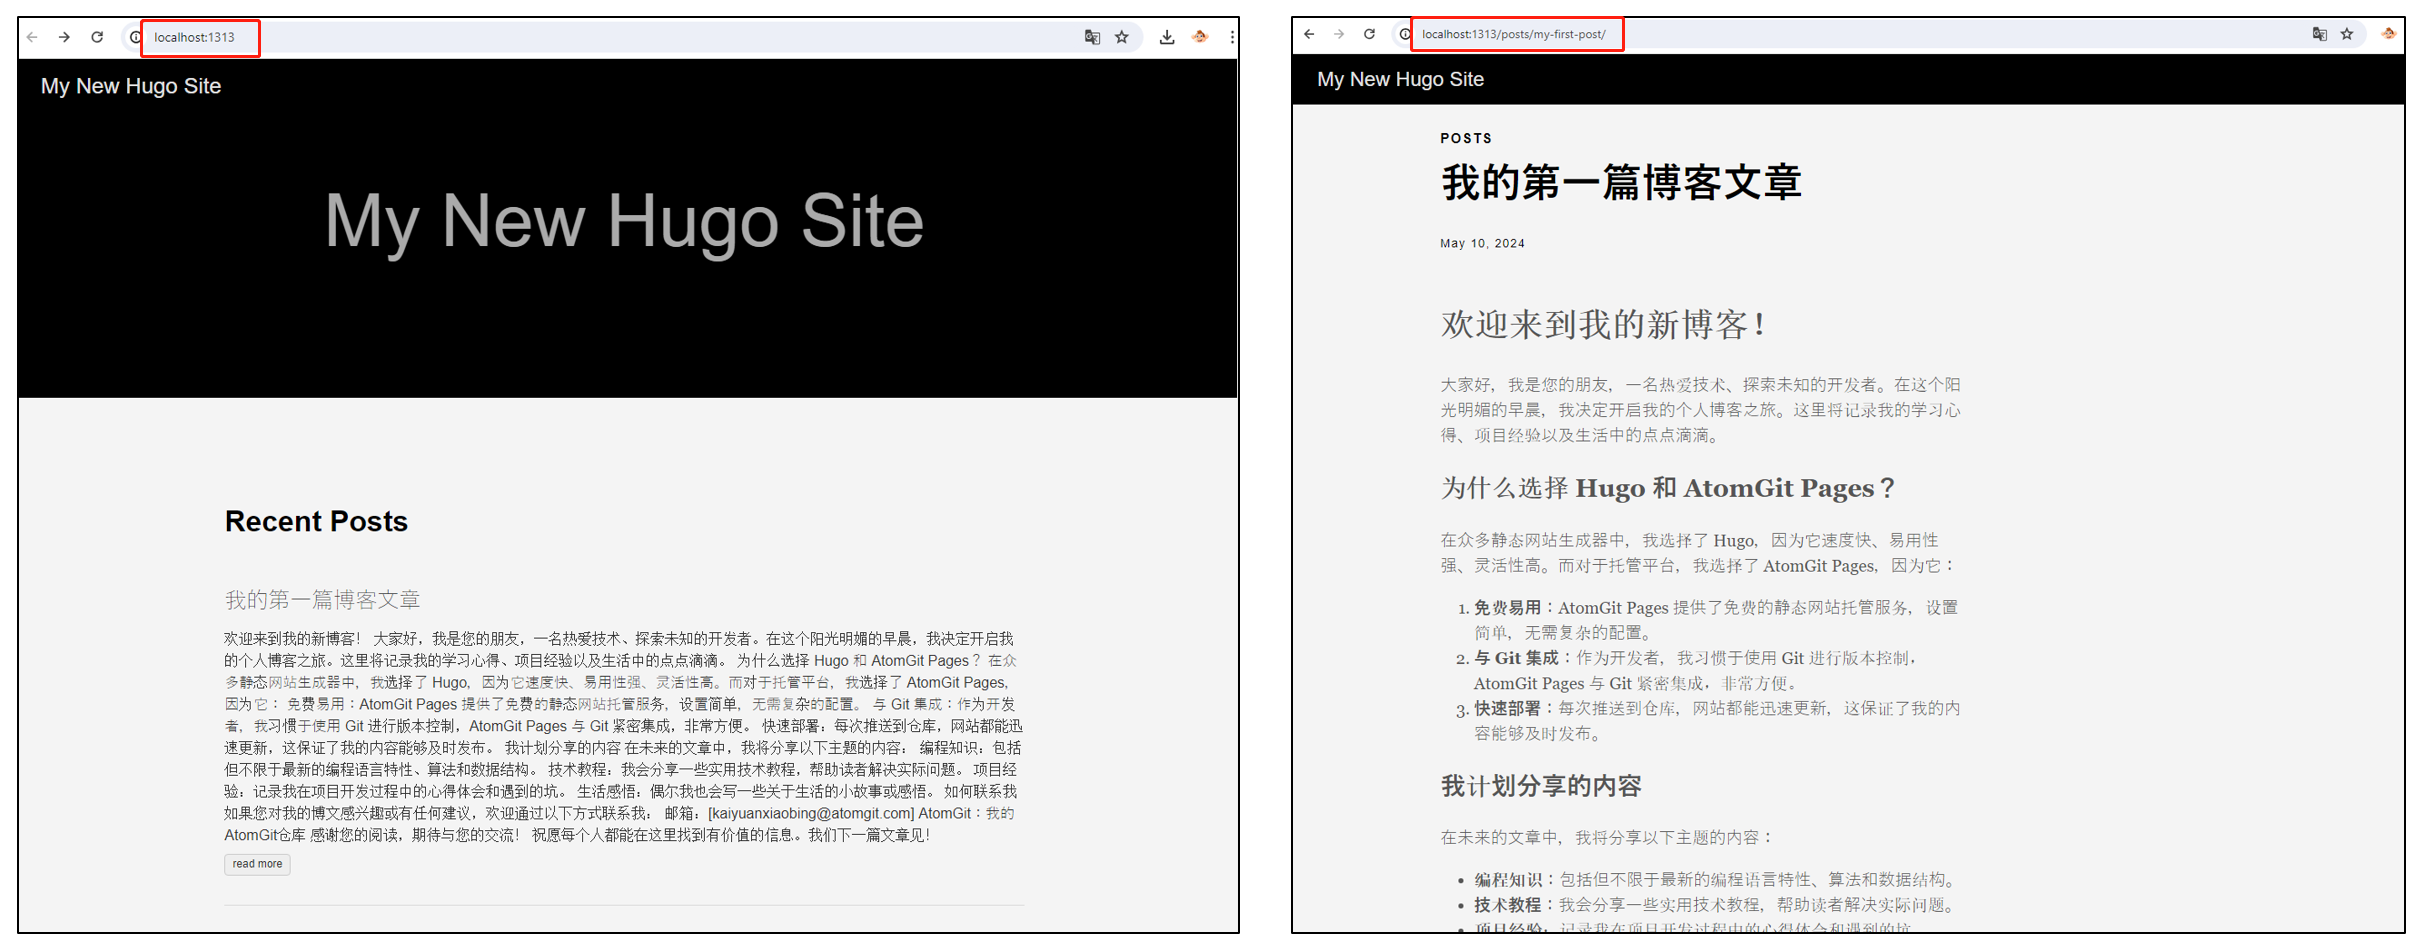
访问 http://localhost:1313 查看效果:
5. 部署到 AtomGit Pages
- 初始化网站目录并配置输出路径:
cd ..
mkdir my-blog-website
cd my-blog-source
编辑 hugo.toml 文件,添加输出路径配置:
publishDir = "../my-blog-website"
- 初始化网站仓库:
cd ../my-blog-website
git init
git remote add origin git@atomgit.com:你的用户名/my-blog-website.git
- 编译并发布:
cd ../my-blog-source
hugo
cd ../my-blog-website
git add .
git commit -m "Initial website deployment"
git push -u origin master
- 开启 Pages 功能: 在 AtomGit 仓库设置中启用 Pages 功能:

自动化部署脚本
为了简化部署过程,你可以使用以下自动化脚本:
Windows 脚本 (update_blog.bat)
@echo off
setlocal EnableDelayedExpansion

:: 配置信息
set SOURCE_DIR=my-blog-source
set WEBSITE_DIR=my-blog-website

:: 执行部署
cd %SOURCE_DIR% || (
    echo Failed to enter source directory
    exit /b 1
)

hugo || (
    echo Hugo build failed
    exit /b 1
)

git add .
git commit -m "Update blog source" || (
    echo No changes to commit in source
)
git push origin master || (
    echo Failed to push source
    exit /b 1
)

cd ..\%WEBSITE_DIR% || (
    echo Failed to enter website directory
    exit /b 1
)

git add .
git commit -m "Update blog content" || (
    echo No changes to commit in website
)
git push origin master || (
    echo Failed to push website
    exit /b 1
)

echo Deployment completed successfully!
Unix 脚本 (update_blog.sh)
#!/bin/bash

# 配置信息
SOURCE_DIR="my-blog-source"
WEBSITE_DIR="my-blog-website"

# 错误处理函数
handle_error() {
    echo "Error: $1"
    exit 1
}

# 执行部署
cd $SOURCE_DIR || handle_error "Failed to enter source directory"

hugo || handle_error "Hugo build failed"

git add .
git commit -m "Update blog source" || echo "No changes to commit in source"
git push origin master || handle_error "Failed to push source"

cd ../$WEBSITE_DIR || handle_error "Failed to enter website directory"

git add .
git commit -m "Update blog content" || echo "No changes to commit in website"
git push origin master || handle_error "Failed to push website"

echo "Deployment completed successfully!"
提示:使用脚本前,请确保替换了相应的用户名和路径。
故障排除
- Pages 部署后无法访问:检查仓库是否为公开类型,确保 Pages 功能已启用。
- Hugo 构建错误:确认 Hugo 安装正确,检查主题配置。
- Git 推送失败:检查 SSH 密钥配置,确保网络连接正常。
参考资源
现在你已经成功搭建了自己的静态博客网站!遇到问题,可以再次反馈。
